
The only way to be sure that your game PC is completely customized to your tastes is to build it from scratch. You can be sure that your computer will give you the game experience you want with smooth frame rates if you choose every part by hand, from the power supply on up. In addition, a custom-built PC lets you add on new features as technology improves, your game tastes change, or your budget allows.
Putting together a game desktop might sound hard, especially if you’ve never worked inside a case before. But it’s actually easier than you think. The detailed, step-by-step instructions below will help you easily put together your own gaming PC. They also include a lot of helpful tips and tricks from professionals.
Table of Contents
Preparation 1: Tools for Building a PC
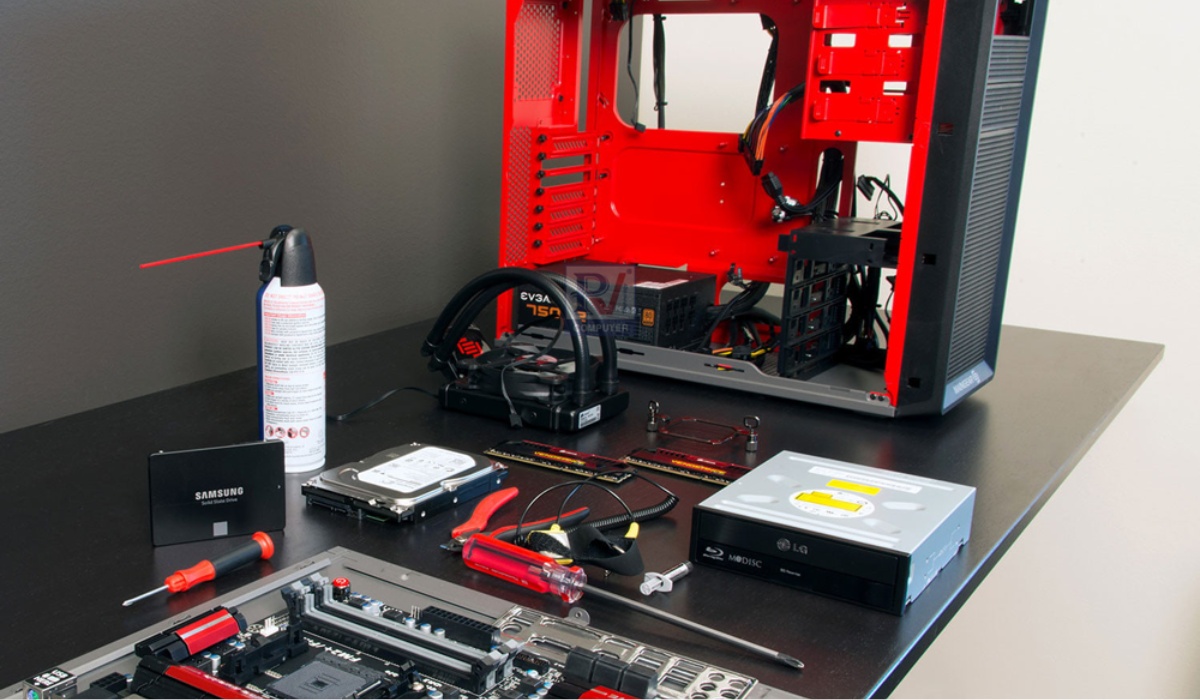
It’s important to get all of the tools you’ll need before you start building your PC. Getting the supplies and work area ready will make sure the building process goes smoothly.
Workspace: Get a table or another big, flat surface ready to use. To keep sensitive parts from getting damaged by electrostatic discharge, it’s best to work on a surface that isn’t carpeting.
Tools: A Phillips screwdriver is a must-have for this build because it will be used for most of the jobs. You’ll also need a Phillips screwdriver if you want to add an M.2 device.
Tip: Magnetic screwdrivers might be a good idea because they keep screws from falling inside the case and are less likely to damage the parts.
USB flash drive: Get a flash drive with at least 8GB of space to store the software for the OS you’ll be using. This is what you’ll need to put the OS on your brand-new PC.
Preparation 2: Cases for gaming PCs
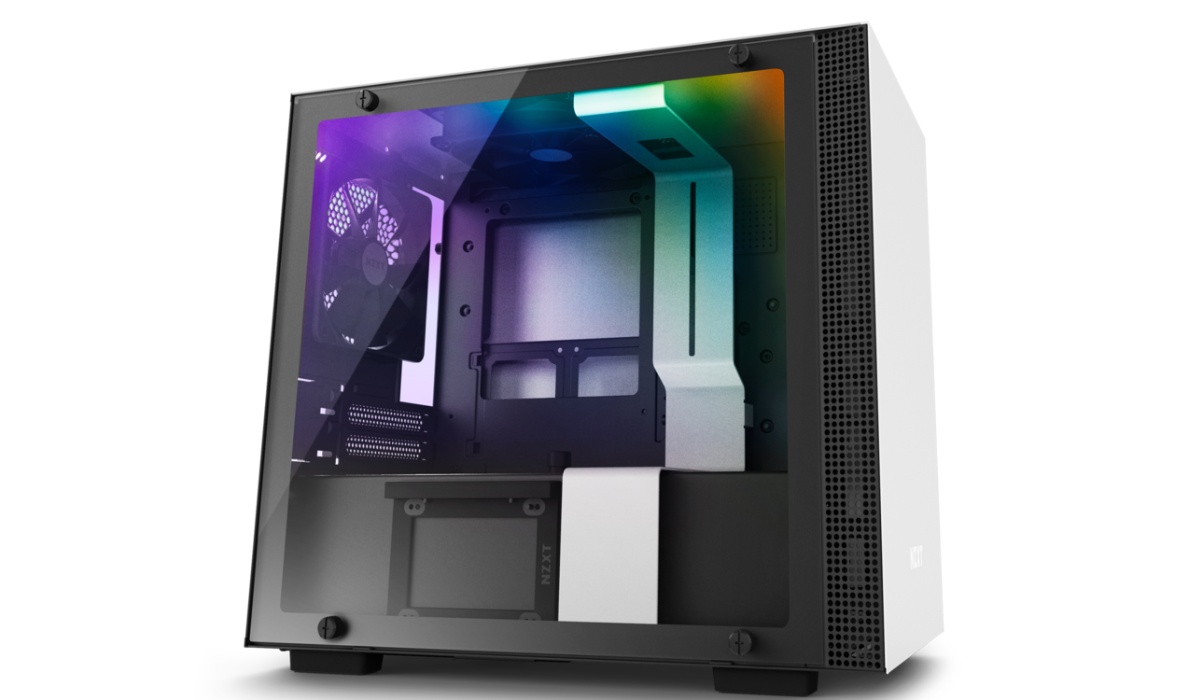
Before you buy parts for your gaming PC, you should think about the case, or at least the size of the case you want.
The main thing you should think about when picking out a case is where you want to put the computer. Where you plan to put your PC will decide the size limits and whether you need certain premium case features. For example, if you plan to hide your computer under a desk, you might not need to buy a case with a toughened glass side panel.
There are three main types of cases: full-tower, mid-tower, and mini-tower. These are just general groups. Case sizes change from brand to brand and depend on the size of the motherboard.
Preparation 3: Parts for a gaming PC
It’s time to assemble your parts. Take an active or passive role in this step, depending on your choice. To make your own custom setup, you can carefully study each part or change a pre-made setup to fit your needs and budget. Consider these important things:
Budget: Take a look at your budget before choosing any parts. Any part can be upgraded later, so choose the most affordable option first.
Compatibility: Make a listing of all the parts you need before you buy them to make sure they can all work together.
System Requirements: If you’re building this PC to play games, make sure you know what the games you want to play’s recommended system requirements are and schedule your work properly.
In addition to the case, a gaming PC needs the following:
- The central processing unit (CPU)
- The graphics processing unit (GPU)
- Headboard ( Motherboard)
- Memory (RAM)
- Storage (in HDD or SSD)
- Power Supply Unit
- Cooling the system (USB and CPU coolers)
- Gaming Accessories (keyboard, mouse, monitor, etc.)
- System software
Explore the purpose of each part, why it’s important, and what to think about when shopping for it.
The central processing unit (CPU) is like the brain of your computer. It runs programmes by following the directions they are given and coordinating tasks with other parts. Its speed affects many parts of your computer experience, such as streaming, gaming, making content, and doing more than one thing at once.
When picking a CPU for gaming, a high Max Turbo Frequency is most important. This is what sets the fastest clock speed that Intel Turbo Boost technology can reach. Also, think about the number of cores and threads, as they affect how well multithreaded apps work and how many tasks can be done at once.
Graphics Processing Unit (GPU): A discrete graphics card, or GPU, is needed to get high frame rates and realistic images in demanding games. As an example, Intel® ArcTM A-series GPUs support advanced rendering methods such as ray tracing and XeSS upscaling, which improves speed and image quality.
When comparing GPUs, look at benchmark scores and the system requirements suggested for future games to make sure they will work with each other and give you the best performance.
The motherboard is the main computer board that links all the other parts. Pick a motherboard based on its form factor to make sure it works with the hardware you already have and will get in the future.
Size (from Extended ATX to Mini-ITX) and connectivity with the parts you want to connect are some things to think about. For better speed and connectivity, choose newer motherboards that support cutting-edge technologies like DDR5 RAM, PCIe 5.0, and Intel® KillerTM Wi-Fi 6E that is built in.
Steps to build a gaming desktop
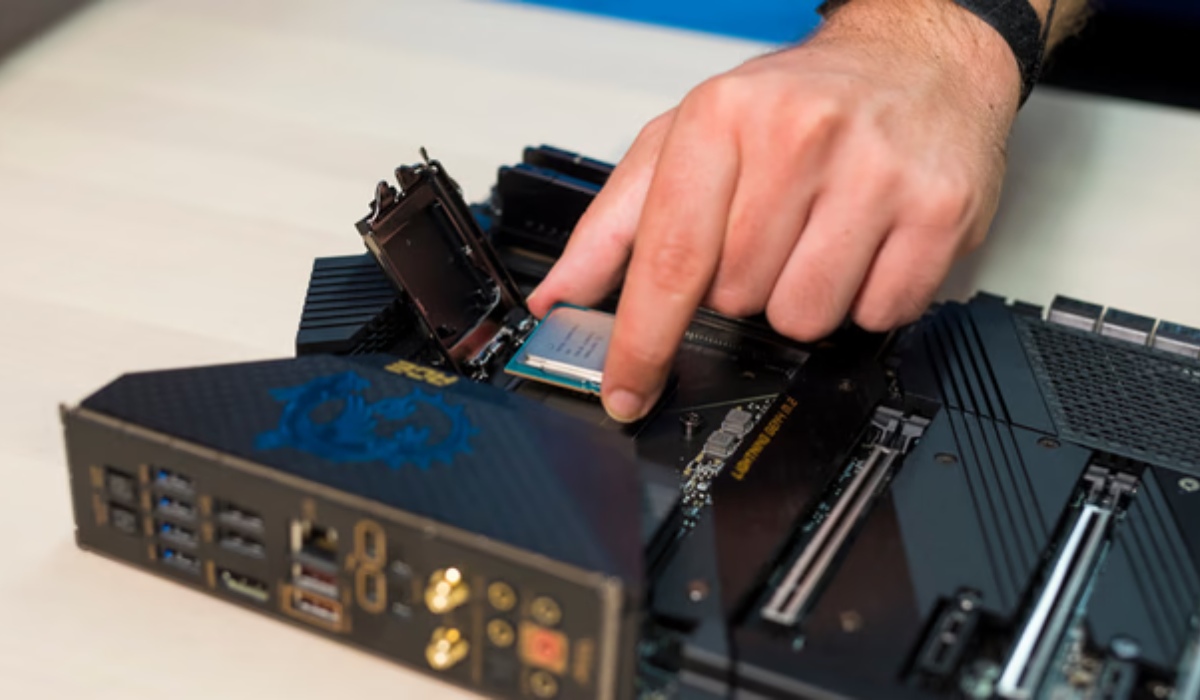
Step 1: Install CPU and Apply thermal paste
Assemble your CPU
 (Credit: coolblue)
Remove the motherboard from its static-proof packaging and place it on your work surface. Firstly, identify the CPU socket location on your motherboard. It is a large slot located at the center of the motherboard, featuring a metal protective cover and pins. If you cannot locate this position, refer to the accompanying motherboard manual for more detailed instructions.
Next, press down the small metal lever and gently slide it to one side (away from the socket) to open the CPU socket tray.
Unbox the CPU and handle it with extreme care to avoid physical damage. Hold the CPU by its edges avoid touching the pins at the bottom and try not to contact the top surface.
Identify the arrow on the CPU and align it with the arrow on the socket. Place the CPU gently into the socket.
Once the CPU is in position, lower the retention lever and push it back into place. It may require some force to lower the lever, but placing the CPU should be gentle.
Apply thermal paste.
While thermal paste is often pre-applied on CPU coolers, there are cases where you need to apply it yourself. If your chosen CPU cooler requires manual application, here’s how to do it. Try creating a thin cross pattern from one corner to another on the metal surface of the CPU cooler.
Both current AMD and Intel CPUs have sufficiently sized heatspreaders, so applying a small dot in the middle of the cooler may not ensure even coverage. We also recommend using a protective film on the thermal paste when using the new AMD Socket AM5 CPUs to prevent any leakage into gaps on the heatsink.
Any area left without thermal paste won’t efficiently transfer heat from the heatsink to the contact plate of the cooler, potentially hindering cooling. Use thin lines around the width of a dry spaghetti strand. For older, smaller Intel CPUs, a single line from top to bottom in the middle of the heatsink is sufficient.
For more information on which thermal paste to use and how to apply it, refer to our comprehensive guide on how to apply thermal paste.
Step 2: Installing CPU Air Cooler
On an Intel motherboard, secure the cooler into the four mounting holes around the CPU socket using push pins or a backplate (depending on the model).
For AMD motherboards, use the built-in clips on the AM4 socket or remove the existing clips for cooler installation.
Remove the protective plastic and install the cooler onto the CPU socket. Exercise caution with screwdrivers to avoid damaging the motherboard.
Ensure the fan directs airflow from the heatsink out of the case. Connect the fan to the CPU fan header on the motherboard.
Check the case’s airflow direction to ensure proper installation.
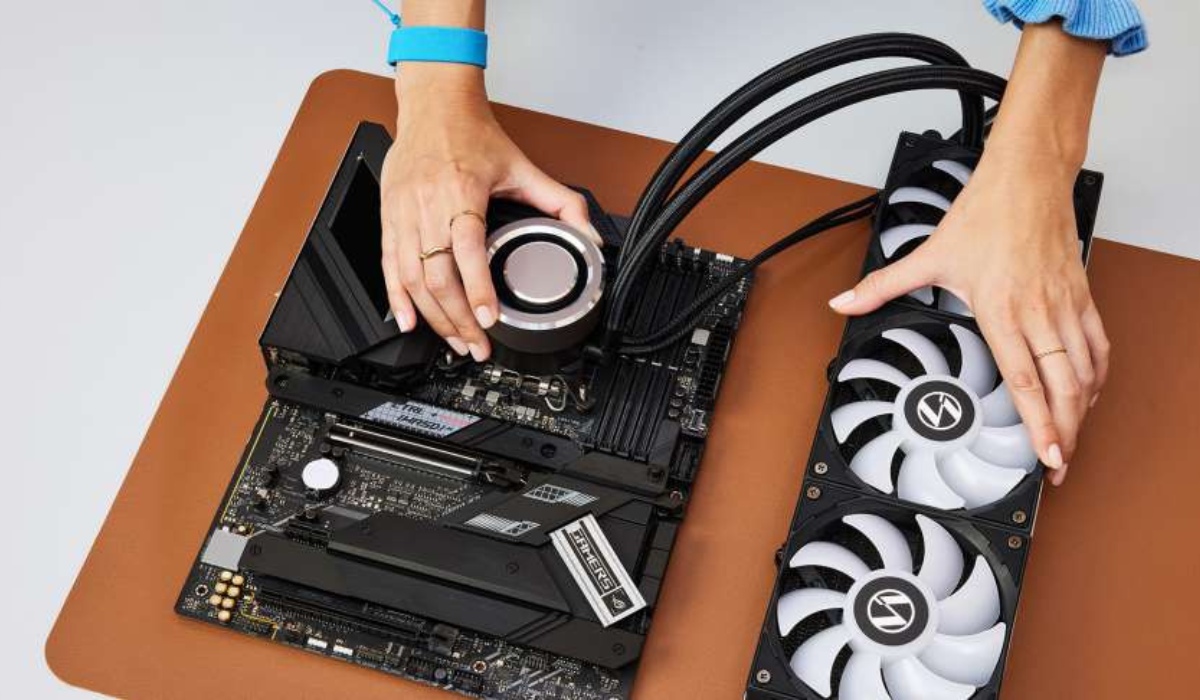
Step 3: Installing Liquid CPU Cooler
 (Credit: intel)
Start by removing the protective layer and taking components from the box. Place the water block on the CPU and attach the cooling unit to the motherboard, using the appropriate tool. Install the pump and other components onto the motherboard, following the product instructions.
For optimal cooling efficiency, position the pump higher than the radiator to prevent air entrapment. Mount the fan onto the cooling unit, ensuring it serves as an air intake. Securely attach the cooling unit to the case with small screws.
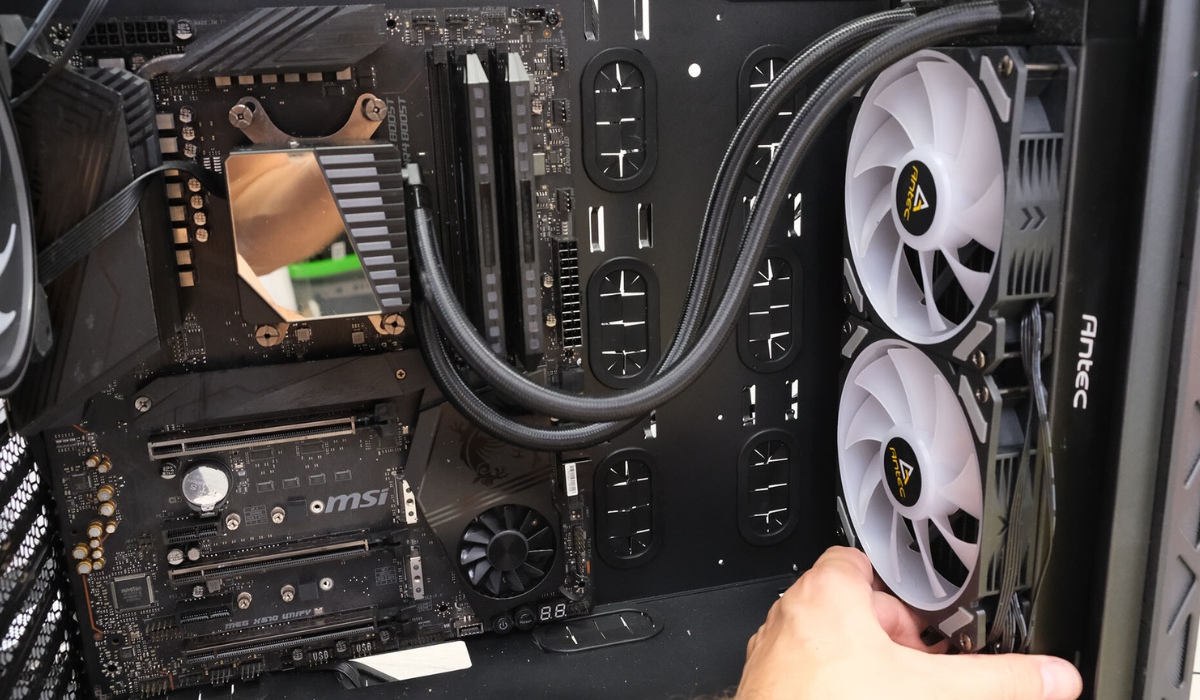
If there is no fan mounting bracket, you can place the cooling unit at the front of the case with the tubes at the top. Connect the pump and fan following the product guidelines, using the dedicated pump connector.
Check and ensure the pump operates at maximum speed. Connect the power supply for both the pump and fan according to the product instructions.
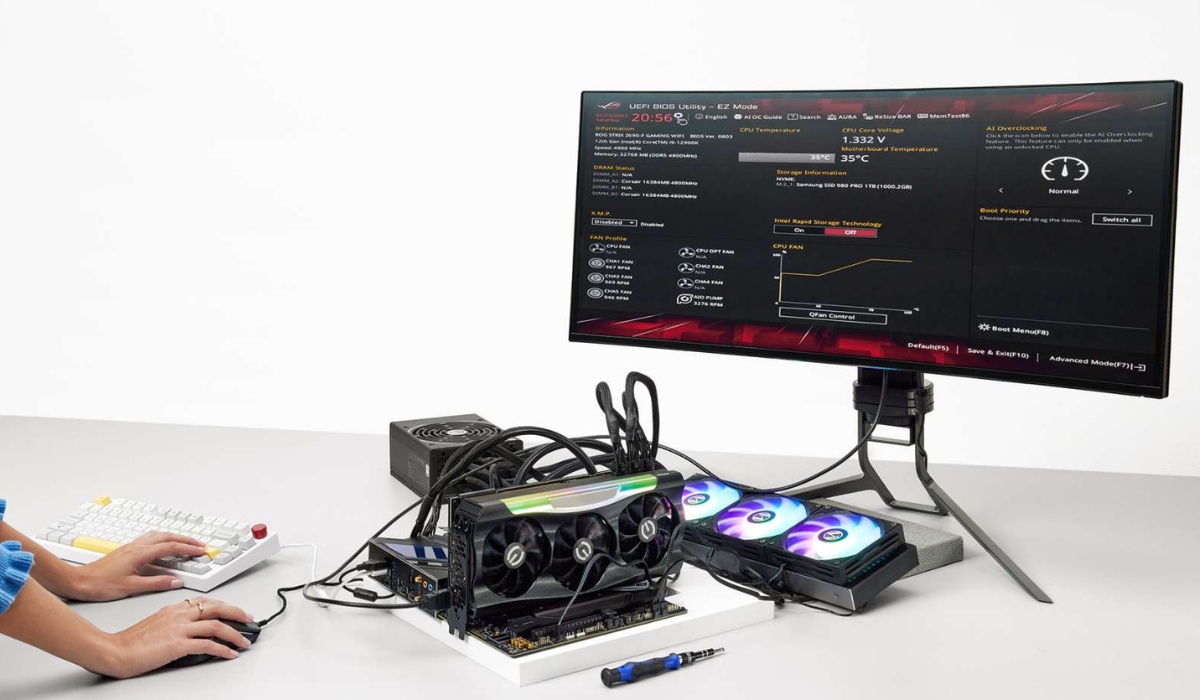
Step 4: Conducting External System Test
 (Credit: intel)
After installing the CPU and CPU cooling system, you may want to perform a quick check of the components to ensure that everything is functioning properly. This test is easier to carry out (and troubleshoot) compared to when everything is already mounted in the case. To do this, attach the GPU and connect everything to the power supply (if you’re unsure how to attach the GPU, see the section below). Make sure the power supply is connected to the motherboard, including both the CPU and GPU, then connect and power on.
Some high-end motherboards have a power button, but for many others, this button is not present. If you don’t see a power button, identify the location of the power switch pins—pairs of small pins protruding from color-coded nodes. The power switch pins may be labeled (such as “PWR_ON”). To turn on the motherboard, use a screwdriver to touch both pins of the power switch simultaneously.
Next, you can determine if any component is not working or has issues. If lights on the motherboard are blinking or there are beeping sounds, these could be signs of a problem. Some motherboards provide a display screen showing the POST code (Power-On Self-Test) to help you identify the issue. To understand these messages, refer to your user manual. If your motherboard doesn’t have a POST code display, connect a monitor to the GPU and check if the system goes through POST, displaying the motherboard logo.
Once you have completed the testing process, power off and wait until all LED lights on the motherboard turn off to ensure there is no residual power in the system. Then, remove the GPU and disconnect all power cables before proceeding to the next step.
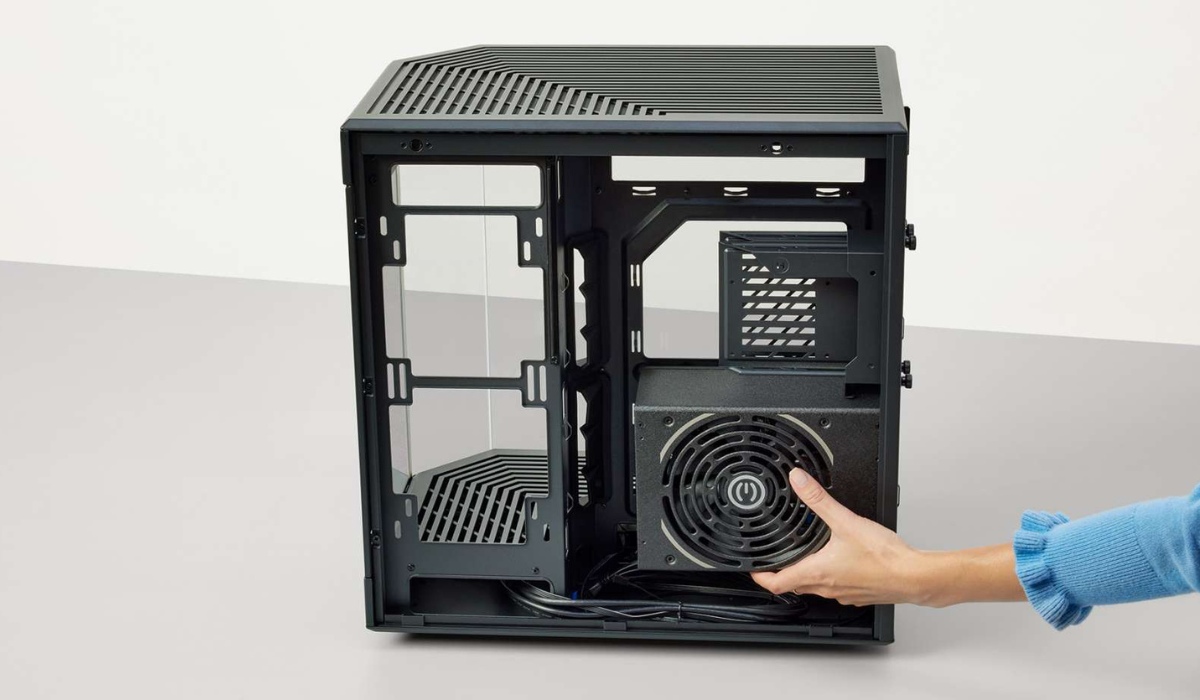
Step 5: Installing the Power Supply Unit (PSU)
 (Credit: intel)
Open the PSU box (or unplug it from components if you choose to run an external test) and set aside its cables (if it’s a fully wired or semi-modular device).
Examine your case and determine where the PSU will go (typically at the bottom, near the back) and its orientation. Ideally, you want to orient the PSU so that its fan faces outside the case (through the ventilation hole). If your case has a ventilation hole at the bottom, you can install the PSU upside down, as long as the bottom ventilation hole receives an appropriate airflow when the PC is finished.
If your case lacks a ventilation hole, install the PSU with the fan facing upwards (towards the inside of the case) and ensure the fan has sufficient clearance. Secure the PSU to the case using the four screws provided with the PSU.
If you are using a non-modular or semi-modular power supply, now is the time to route the included cables through the case to their respective destinations (use cable management features if your case has them).
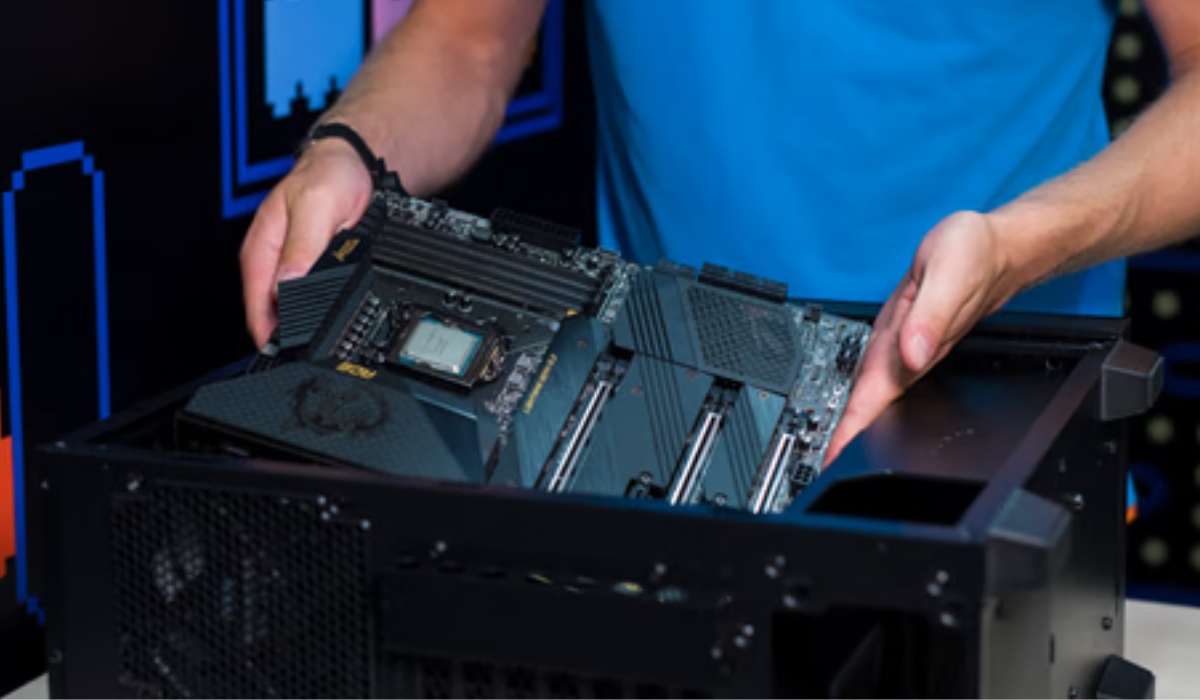
Step 6: Install the motherboard into the computer case
 (Credit: coolblue)
If your motherboard comes without an included I/O shield-a rectangular metal plate with cutouts for the motherboard ports-begin by attaching it to the designated position at the rear of the case (ensure proper orientation). The I/O shield often has sharp edges, so handle it carefully.
Once the I/O shield is in place, proceed with the installation of the motherboard. Thoroughly check to ensure all your cables are correctly routed, then position the motherboard (align it with the I/O shield first). Using a Phillips #2 screwdriver, secure the first screw-the one in the middle-to hold the motherboard in place. Ensure you do not drag your motherboard across the standoffs attached to the case frame.
The number of screws required to secure the motherboard may vary depending on the motherboard, but a standard-sized ATX motherboard typically requires nine screws. Fill all available screw holes.
Step 7: GPU Installation Guide
 (Credit: coolblue)
Identify the PCIe x16 slot on your motherboard. This is the longest PCIe slot and may have a different color compared to other slots. If your motherboard has more than one PCIe x16 slot, refer to the user manual to determine the priority slot, if any. If there is flexibility in choosing the slot, determine the slot based on the positioning of other components to ensure ample space for the GPU.
Depending on the case type, you may need to remove the I/O shield (small metal tabs blocking the rear of the case) to make the I/O ports of the GPU (HDMI, DisplayPort, DVI, etc.) easily accessible from the outside of the case.
Unbox the GPU from its electrostatic packaging and carefully align it with the rear bracket and primary slot, then gently push it into the PCIe x16 slot (you may hear a clicking sound). The PCIe tab on the motherboard may move into a locked position if you need to reattach the GPU.
Once the GPU is fully installed, use one or two screws to secure it to the rear of the case. If your GPU requires supplementary power, connect it to the power supply.
Step 8: Installing M.2 SSD
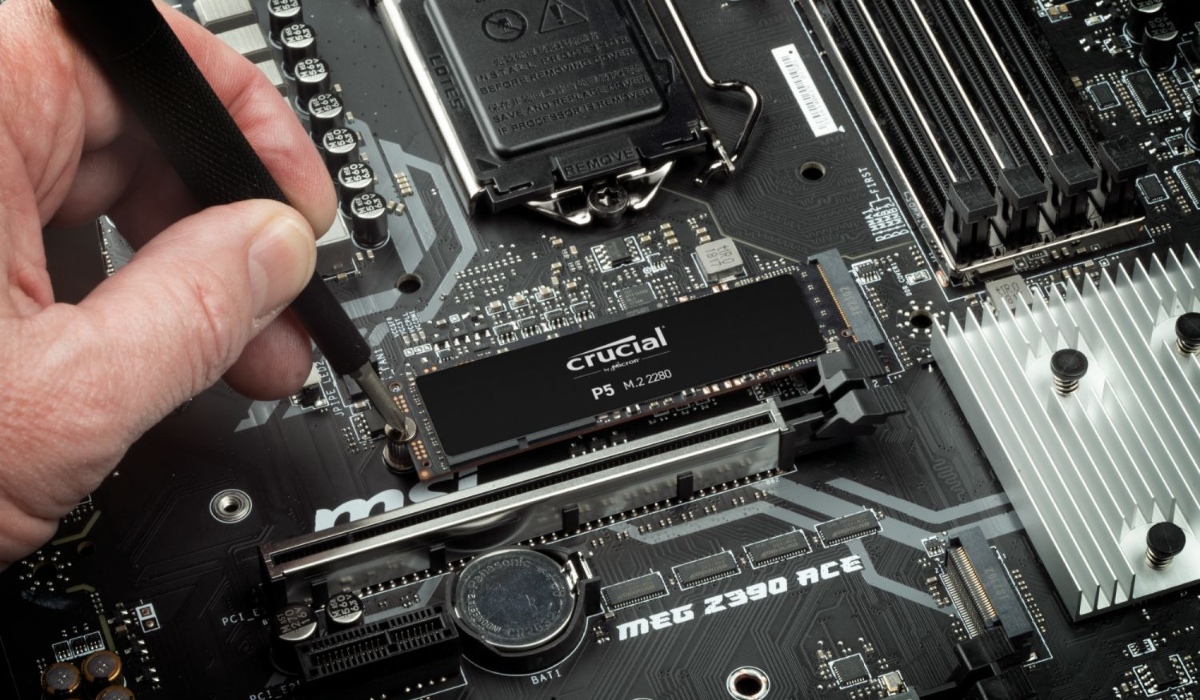
If you’re new to PC building or upgrading from an older system, M.2 SSDs offer a cable-free connection directly to your motherboard. Ensure you use the correct M.2 slot.
For PCIe 3 M.2 SSDs, they work in any slot. For PCIe 4 or PCIe 5, check your motherboard manual for compatibility. Some motherboards provide cooling; remove the heatsink, uncover the SSD, and secure it with screws or clips.
Insert the M.2 SSD into the slot, aligning the notches. Use a small screwdriver to secure it, or on some motherboards, employ tool-less clips for an easier installation. Refer to our SSD installation guide for more details.
Step 9: Install Memory (RAM)
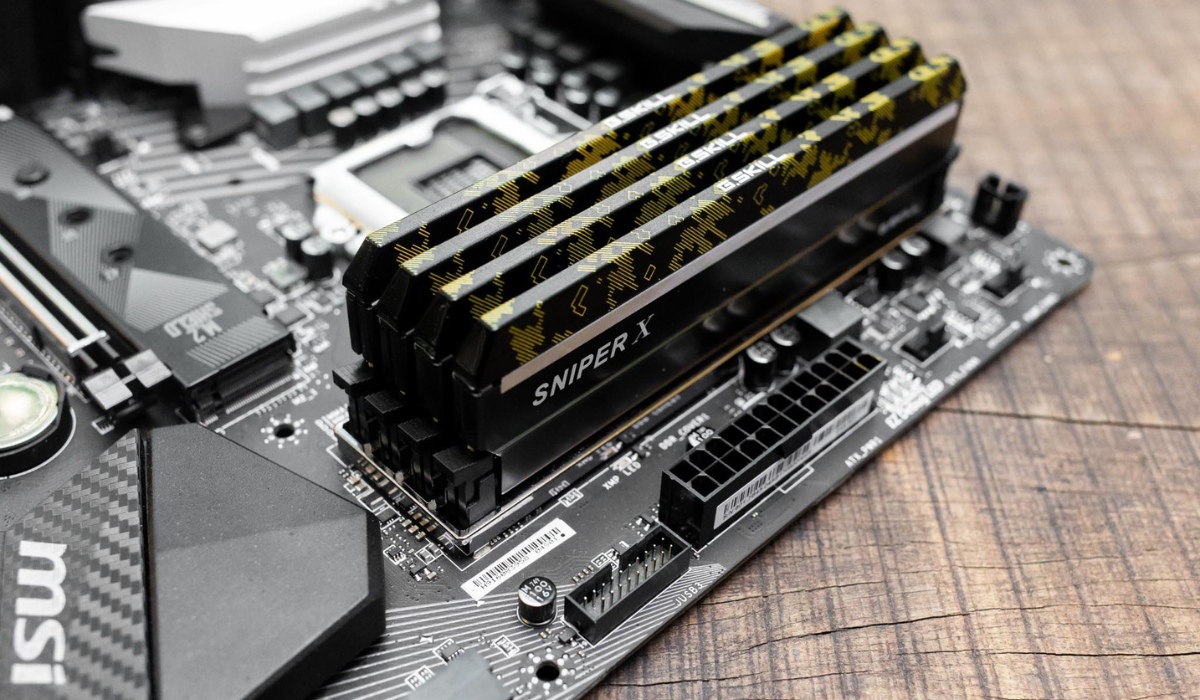
Memory modules can only be installed in DDR4 or DDR5 DIMM slots on your motherboard, easily identifiable by matching notches with the pins inside.
Most motherboards have four slots, but your memory kit may consist of only two modules. It’s crucial to place your modules in specific slots, as modern motherboards can access data from both simultaneously, known as dual-channel mode, significantly enhancing performance.
To activate dual-channel mode, install your module pair in slots two and four, or the second and fourth slots furthest from the CPU socket. When inserting a module, lift any latches at the ends of the slot first.
Press firmly in the middle of the module to secure it into the slot, and you’ll hear a click when it’s in place. End latches at the CPU socket will lock onto the module. Ensure both modules are seated evenly and at the same height.
Step 10: Operating System Installation Guide
If you haven’t prepared your operating system (OS) on a USB flash drive, now is the time to do so. (Refer to the OS section in “PREP 3: Choose Your Components” for more details.)
Plug in the USB flash drive containing your OS, as well as your monitor, mouse, and keyboard, then power on your PC.
The first screen you encounter will prompt you to press a key to enter system setup or BIOS. Press the key to open the BIOS. (If the screen turns off too quickly, preventing you from seeing the key, consult your motherboard’s user guide.)
Firstly, you’ll want to check that all your components are installed and recognized. Locate the BIOS page displaying your PC’s system information (different motherboards have different BIOS setups, but you’ll find a screen providing this information) and verify that the system recognizes everything you’ve installed so far.
Next, navigate through the BIOS until you find the Boot page (may be called “Boot Order” or “Boot Priority”). Change the boot order so that your USB flash drive is the first drive and the drive where you want to install the OS (if you’re using an SSD as the boot drive, you’ll want to install the OS here) is the second drive.
Restart your computer. Your computer will boot from the USB, and the OS installation wizard will appear. Follow the instructions to complete the installation.
Tips for After the Build
Once the build is done, you should update the drivers, make sure the settings are perfect, and think about boosting if your parts allow it. Remember that a custom PC build is an ongoing process that includes upgrades and tweaks after the original setup.