
Here you are, starting the fun process of building your own PC! If you’re a gamer looking for the best experience, a creative worker needing powerful rendering power, or just someone who likes the challenge of do-it-yourself projects, building a PC from scratch is fun and educational.
The process of putting together a computer may seem hard at first. Still, anyone can take a bunch of parts and put them together in a way that works with the right help and knowledge. This guide will help you understand the complicated parts and give you step-by-step advice on how to make a system that fits your needs and preferences.
You can make your PC exactly how you want it, and you’ll also get the most for your money if you build it yourself. You will learn about the complexity of hardware, how each part works, and how they all fit together to make the digital age possible.
We’ll talk about everything in this guide, from choosing the right tools and parts to installing an operating system and finishing up. Each part has been carefully written to be clear and easy to understand, and it includes best practices, tips, and tricks.
Put on your work gloves and get ready for a fun journey into the world of PC building, whether this is your first time or you’re an experienced builder looking to improve your skills. After reading this guide, you’ll not only have a machine that works for you, but you’ll also understand the technology you use every day better.
Allow us to begin constructing the PC that will be the mainstay of your online existence!
Tools and Parts that are Necessary for Putting Together a PC
Before you start the fun and satisfying process of building your own PC, you need to make sure you have all the right tools and parts. Not only does good preparation make the assembly process go more easily, it also lowers the chance of damage and other problems that can happen when you don’t have the right tools. Here’s what you need to make sure your computer build goes well from the start.
Table of Contents
What You Need
Screwdriver with a Phillips head
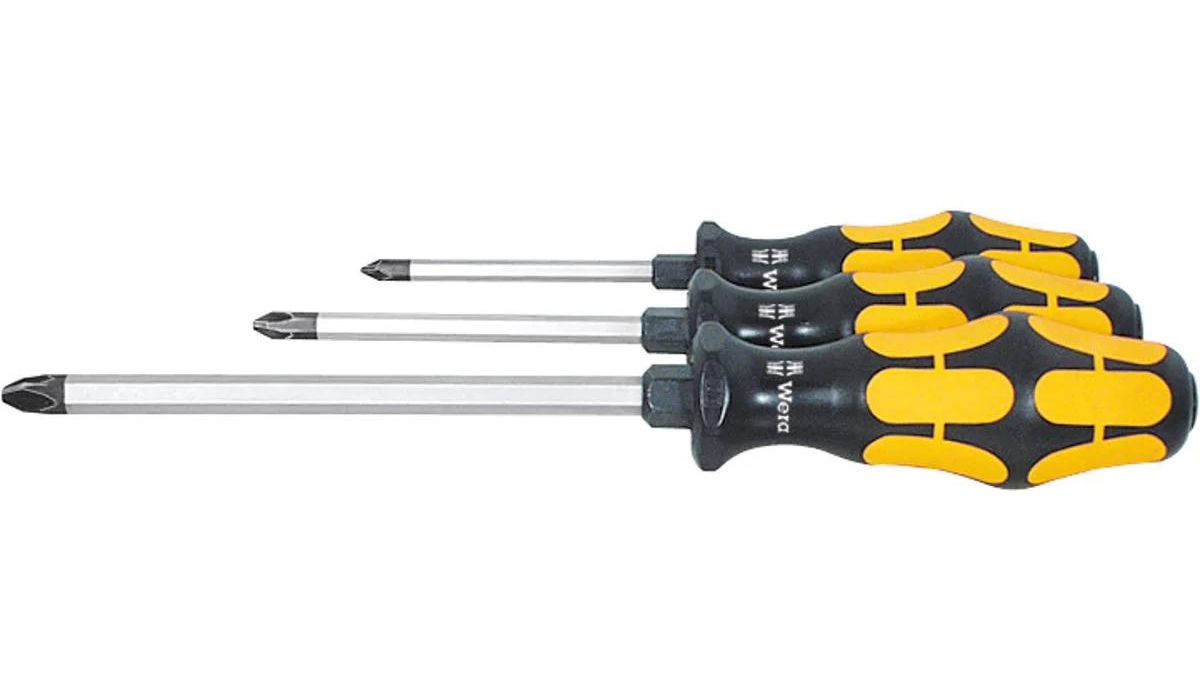
A Phillips head screwdriver is the most important tool for anyone building a PC. It’s used to tighten and loosen screws on different parts. If you need to work with small screws that are easy to lose, choose one with a sticky tip.
This is an anti-static wrist strap. Static electricity is bad for gadgets that are easily damaged. An anti-static wrist strap is an important safety item that grounds you and stops static electricity from damaging your electronics.
Thermal Paste
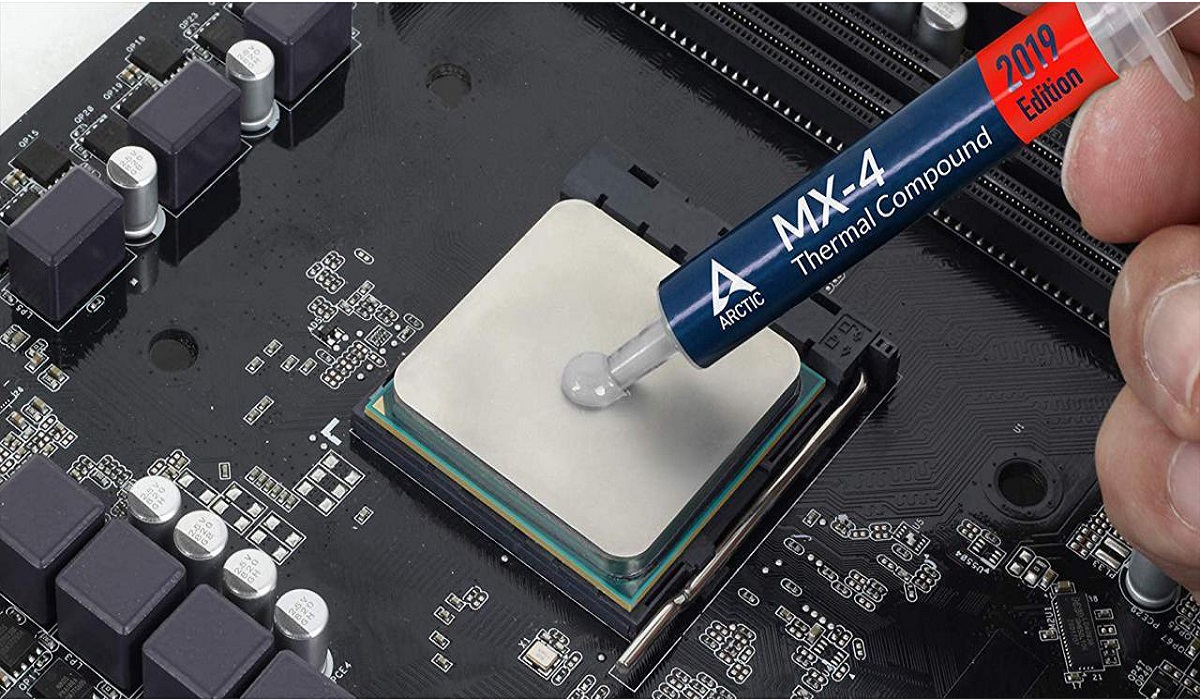
You need good thermal paste to seal your CPU and cooler so that heat can flow through them. This paste is very important for keeping your CPU cool and working at the best settings.
Cable Ties
Keeping cords in order is important for both looks and airflow. Utilizing cable ties is an easy way to organize your cords and keep them out of the way, which in turn helps the case keep its cool and airflow.
Scissors or Cable Cutters
Finally, you will need a pair of scissors or cable cutters to cut wire ties or open packages. They should be sharp enough to make clean cuts that don’t fray wires or leave rough edges that could hurt someone or damage parts.
Getting these tools is the first thing you need to do to build your own PC. You can carefully and precisely put together your parts because each tool has its own role to play in the process. Finding all the parts you need is the next step. These will be the building blocks of your new computer. Now that you have these tools and parts, you can start putting the computer together, knowing that you have everything you need to make a computer that will last for a long time.
As you start putting together your computer, it’s important to have a good idea of the parts that will make it work. To understand this better, picture these parts as puzzle pieces that, when put together properly, will make your machine work.
Important parts of a PC:
Motherboard
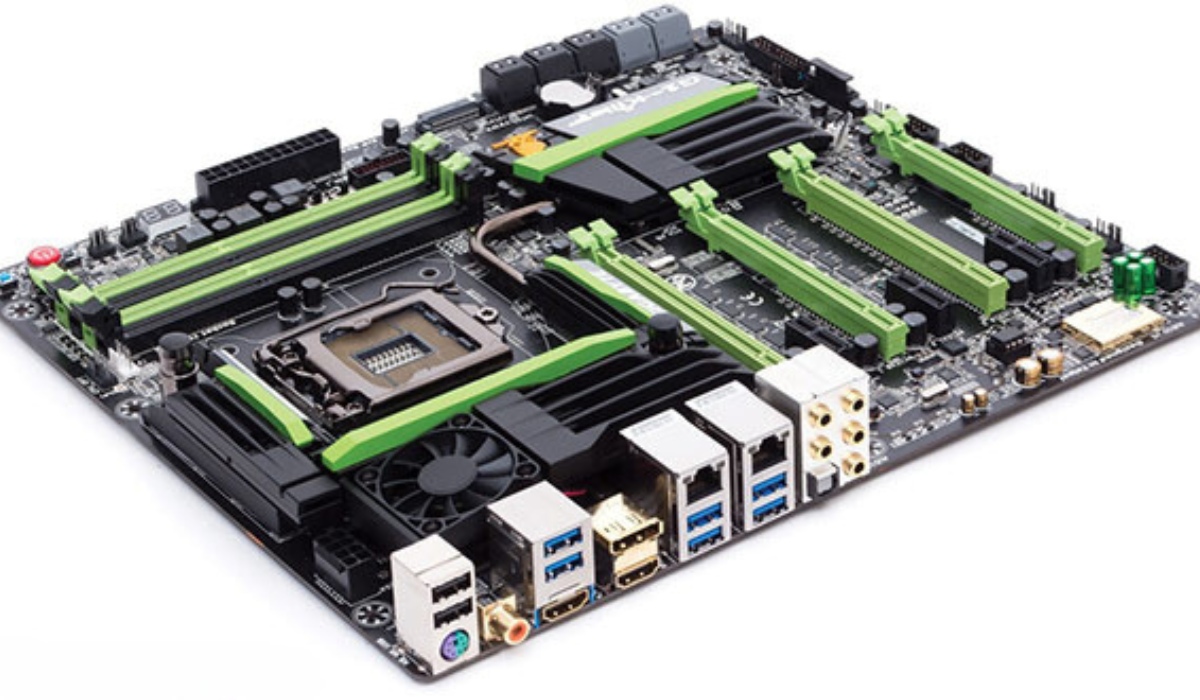
The motherboard is the main communication hub for a computer system. It talks to all the other parts. Even though they come in different sizes and styles, their main purpose stays the same. Picking the right motherboard depends on the processor because it affects how well it will work with the motherboard.
Motherboards are mostly put into groups based on the types of sockets they have, which are necessary for processor compatibility. The two main types of sockets are LGA for Intel processors and AM for AMD processors. Model numbers like “LGA1700” and “AM5” show that they are compatible with Intel and AMD’s newest processors as of 2023.
When it comes to size, ATX motherboards are often suggested, especially for people who are building their first computer, because their layout makes them easier to put together and update in the future. To keep things running smoothly, it’s important to make sure the motherboard size fits the PC case size.
The features that set luxury motherboards apart from budget ones include the number of ports, expansion slots, and RAM capacities. luxury models also often have extra features for looks, like lighting, and more ways to connect, like Bluetooth or Wi-Fi. But these extra features may not be necessary for everyone. For most users, basic features like a couple of M.2 slots for storage and at least 16 GB of RAM for games are enough.
The highlighted motherboards have a range of prices and features to meet the wants and budgets of different people. The Gigabyte A620M Gaming X is good for small systems, while the Gigabyte B650 Gaming X AXE has extra ports like Thunderbolt 3 for mid-to high-end AMD builds. For midrange builds with Intel processors, the Asus Prime B760-Plus D4 has a lot of M.2 ports, while the Gigabyte Z790 game X AXE is the best choice for high-performance game systems with the newest Intel chips.
Processor (CPU)
The central processing unit (CPU) is the most important part of your computer. It connects to the hardware and uses instructions to run programmes. It is as important to a computer system as the brain is to the body. It controls everything, from simple chores to complex computer processes. While the CPU is important for general performance, its price does not always reflect how important it is for gaming, where the graphics processing unit (GPU) is also very important.
As with GPUs and CPUs, prices change a lot, so it’s best to keep an eye on the market if a wanted part is currently out of your price range. If the CPU package doesn’t come with thermal paste, make sure you get it. It’s necessary for the CPU and cooler to effectively transfer heat.
CPUs that have been highlighted can meet a range of needs and budgets:
The Intel Core i5-12600K is a good choice for both general computing and games because it runs smoothly without slowing down when paired with a strong GPU.
Intel Core i7-12700K: It balances speed and price, giving you better options for heavy tasks and high-resolution gaming.
The Intel Core i9-13900K is the best processor Intel has to offer for gamers and content makers who want the fastest speed, but it costs more.
AMD Ryzen 5 7600X: A good performer for games and making content, with competitive performance at a lower price point.
AMD Ryzen 9 7950X is AMD’s top-of-the-line CPU, designed for hard professional and gaming tasks that need strong cooling due to their high heat output.
The GPU is an important part of gaming PCs because it handles visual data and makes it possible to play games at high quality. It’s important not only for games but also for jobs like editing photos and videos that need a lot of graphic processing power.
GPU
The graphics processing unit (GPU), also known as the graphics card, is an important part of any computer that you want to use for gaming, editing videos, or other jobs that need a lot of graphics. The CPU is great at processing data in a straight line, but the GPU is great at processing data in parallel, which means it can handle millions of tasks at the same time. Today’s video games have very complicated and detailed worlds, and all of their parts, from the scenery to the characters, need to be processed in real time to make the worlds feel real.
Graphics cards, especially the newest ones, tend to be more expensive because they are in high demand and play a big part in how well a PC works. But buying a more expensive GPU can make your game setup last longer and work better, so it’s a better investment in the long run than buying a cheaper card that can’t do as much.
There is a good balance between speed and price in the GeForce RTX 30-series from Nvidia. This is especially true since the newer RTX 40-series may still be too expensive for many people. The RTX 2060 is a good choice for moderate gaming and multimedia tasks in this price range. The RTX 3060 is great for high-quality gaming at 1080p and 1440p resolutions, and the RTX 3080 is good for gamers who want 4K performance, even with demanding features like ray tracing turned on.
As for AMD, the Radeon 7000 series is the newest generation of GPUs and has the best speed. For people who want to get the most for their money, older models like the Radeon RX 6600 are great for 1080p gaming. The RX 6800 XT, on the other hand, is still a good choice for high-resolution gaming and can handle difficult games at 4K settings. If you’re ready to look at models from the last generation, these AMD cards are a good mix of performance and value.
Storage
The storage on your computer is like a walk-in closet for all of your digital stuff, like files, games, movies, documents, and pictures. There is an easy way to add more space to your PC; you can always add more storage as your needs change.
Solid State Drives (SSDs), especially M.2 SSDs, are the best choice for fast and efficient storage because they are small, fast, and easy to install without having to deal with bulky cords. So they can be used for both main and secondary storage, since they plug right into the motherboard.
Some of the storage options that stand out are:
The Samsung 980 Pro M.2 SSD is a With read speeds of up to 6,980 MB/s and write speeds of up to 4,876 MB/s, the 980 Pro is a great choice for people who want the best performance. It is known for being reliable and fast. Because it is small, it can be used with most processors that have an M.2 slot.
The Samsung 970 Evo M.2 SSD is a The Samsung 970 Evo is a more affordable choice that still has great speed, with read speeds of up to 3,500 MB/s and write speeds of up to 3,300 MB/s. It’s a great choice for everyday use and gaming because it strikes a good mix between price and performance.
This is the Corsair MP600 M.2 SSD: The Corsair MP600 stands out because it has a built-in heat sink that helps keep the temperature down during heavy data transfers and keeps the speed going. With read speeds of up to 4,950 MB/s and write speeds of up to 4,250 MB/s, it is a strong contender in the market for fast storage.
This is the WD Blue 1-TB Internal SSD: Even though it’s not as fast as the other M.2 SSDs, the WD Blue SSD has a lot of storage space and a good speed, so it can be used as backup storage. This is a good choice for storing big files, video, and games that don’t need to be accessed quickly.
These storage options can be used for a range of tasks, from high-performance gaming and content creation to general storage and media viewing. Users can pick the one that best fits their needs and budget.
RAM
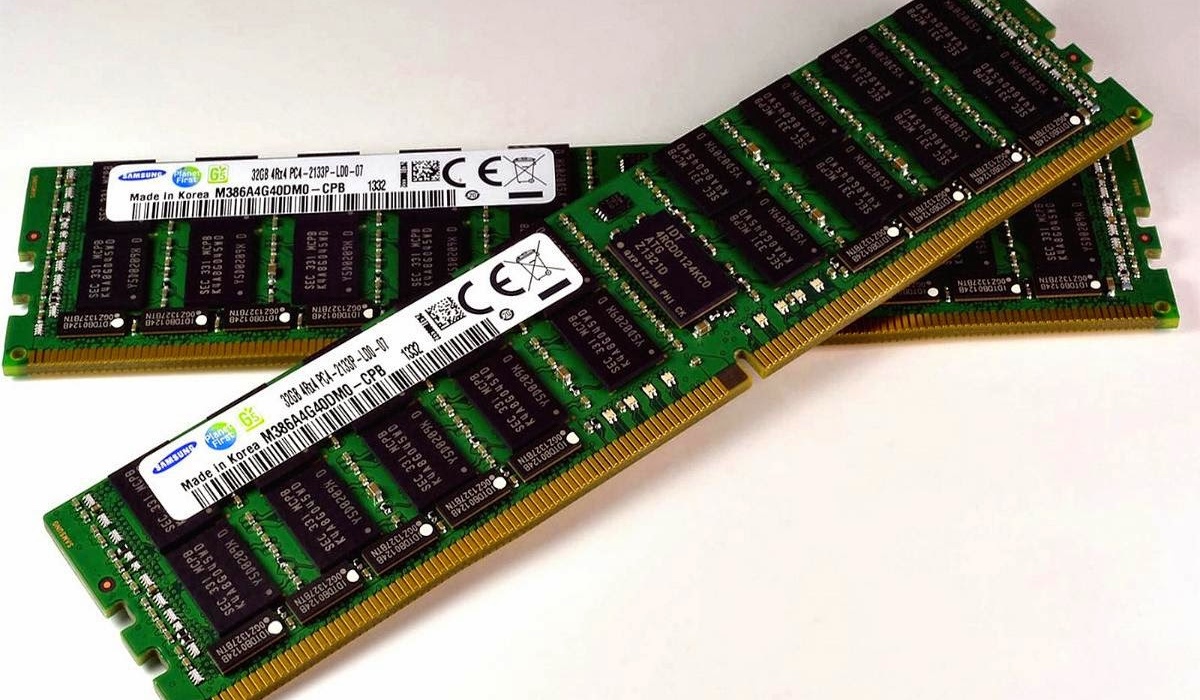
Random Access Memory, or RAM, is an important part of your computer that stores data briefly so that the processor can get to it quickly. RAM is like a brief workspace that gets cleared when the computer is turned off. This is different from storage, which keeps data for a long time. It is one of the most important factors that determines how quickly and efficiently your computer can run apps and handle many jobs at once.
Here are some suggestions for RAM that can be used in different situations:
This is the Corsair Vengeance LPX 16-GB 288-Pin RAM: Most games at 1080p resolution and most computer chores can be done with this setup, which usually includes two 8-GB sticks. It’s a good choice for builders on a budget and people who don’t need a lot of computing power because it hits a good balance between price and performance.
32 GB of G.Skill Ripjaws V Series 288-Pin RAM: Increasing the storage space to 32 GB gives you more room to do more than one thing at once, play games that are harder, and make some content. This much RAM is showing up in more and more enthusiast-level computers because it makes running resource-intensive programmes run more smoothly.
64 GB 288-pin Corsair Dominator Platinum RAM: 64 GB of RAM may be necessary for people who are making high-end content, analyzing data, or wanting to make sure their machine will work in the future. This large amount of memory makes sure that even the most demanding software can run smoothly, making it easy to do many things at once and work with big files.
When choosing RAM, you should think about more than just the amount of space it takes up. You should also think about how fast it is and whether it works with your system and CPU to get the best performance. Also, adding more RAM can boost performance up to a point, but after that, the benefits start to fade. That’s why it’s important to choose RAM that fits your needs and the jobs you plan to do on your PC.
The Power Supply Unit (PSU) is the most important part of your PC because it powers all of its parts and keeps the system running smoothly. Your PSU’s wattage ability should not only meet your system’s current needs, but it should also have enough extra power to handle future upgrades and peak power needs.
There are a number of good power supply units for different types of PC builds:
The EVGA SuperNOVA 750 GA power supply is as follows: A 750-watt PSU is a good choice for a lot of different computers, from mid-range to high-end ones. It has enough power for most single-GPU setups and leaves some room for improvements or extra parts in the future.
This is the NZXT E850 850-watt Power Supply: For more demanding sets, like those with high-end CPUs, GPUs, and lots of peripherals, an 850-watt supply is the next step up. This amount of wattage is good for people who want to overclock or add more drives or a second GPU to their machine.
This is the Corsair RM1000X 1000-Watt Power Supply: A 1000-watt PSU is meant for the most extreme builds, like those with a lot of storage drives, a lot of high-end graphics cards, or a lot of special cooling solutions. It’s a great choice for gamers who want to get the most out of their system without sacrificing power.
When choosing a PSU, it’s important to look at its efficiency ratings (80 Plus Bronze, Silver, Gold, Platinum, and Titanium). These ratings show how well the PSU changes AC power from the wall outlet to DC power that the computer’s parts need, which affects how much energy it uses and how much heat it makes. It is also important to make sure that the PSU fits inside your PC case and has the right ports for your parts. To protect your system from power fluctuations, always choose names that have a good reputation for being reliable and high-quality.
Case and Cooler
Many people just call it the “case,” but the computer case protects and organises all of your PC’s gear. It’s important to pick a box that not only fits your motherboard’s size (e.g., ATX, Micro-ATX, or Mini-ITX), but also looks good and meets your needs in terms of functionality, such as cooling, port access, and expansion options.
You can choose from the following case types to suit your tastes and needs:
This is the Corsair Obsidian Series ATX Full Tower: Full tower cases have a lot of room for high-end parts, custom cooling systems, and updates that will come later. They are perfect for fans or people who need a lot of space for cooling and storing. The Corsair Obsidian line is known for having good build quality, a roomy design, and a lot of different options. It’s a good choice for both your first build and a high-performance system.
NZXT H510 Elite ATX Mid-Tower: This case strikes a balance between size and effectiveness by combining NZXT’s simple design with the usefulness of a mid-tower form factor. The glass panels make it possible to see the internal parts in a nice way, making it a great choice for people who care about both looks and function. People like the NZXT H510 Elite because it looks good, is easy to build, and lets air flow well.
The MSI Gungnir 110R ATX Mid-Tower Case is a The MSI Gungnir 110R is a great choice for people on a budget who still want a case that looks good and works well. It’s small for a mid-tower, so you may need to be careful with how you organize the cables and choose the components, but it has a sleek design and RGB lights. The tempered glass screen lets you see the parts without making the visual effects too strong, so it can be used in both professional and gaming settings.
When choosing a case, you should think about not only its size and how well it fits your CPU and other parts, but also how you plan to cool it, such as with liquid or air cooling. Having enough air flow, dust screens, and the right number and placement of fans can have a big effect on how well your system handles heat, which is important for making sure that all of its parts last and work at their best.
Operating System
Choosing an operating system (OS) is the last but most important step in building a custom PC. The OS controls all of the computer’s software and hardware. Custom PCs don’t come with an operating system (OS) already loaded like pre-built systems do. You have to buy a licence and install the OS yourself.
How to Build a Personal PC
Putting together a gaming PC is a lot like putting together a complicated puzzle. Each piece goes in a certain place, and the steps may be different based on the system. You should read the instructions that come with your parts and look for video lessons online to make sure you put them together correctly. Set up a clean, roomy work area with a surface that doesn’t conduct electricity to keep electrical parts from getting damaged by static electricity. During the assembly process, keep the manuals close by and use them as a help. The first thing you should do is put the CPU on the motherboard. Think of this as the base of your PC.
Installing CPU
Installing your CPU is an important part of putting together your PC, and you need to be careful with it because it is a fragile part. No matter if you have an Intel or AMD CPU, you shouldn’t touch the pins or contacts on the bottom of the chip. The oils on your fingers can damage them, or you could accidentally bend a pin and make the processor useless.
Before you put your processor in the right place, make sure the CPU socket on the motherboard is not locked. This socket is usually a square area with several holes or contacts and a locking or unlocking device that looks like a lever or button. The manual that came with your motherboard will tell you exactly how to unlock the socket.
Next, make sure the processor is lined up with the socket and that it is facing the right way. Find a small golden triangle on one corner of your CPU and match it with a symbol on the socket that looks like it. Put the CPU into the hole carefully, but don’t press down on it. Do not push harder if the processor doesn’t seem to fit. Instead, check the position again.
Once the CPU is firmly in place, it’s time to use thermal paste, which is necessary for the CPU to send heat to the heat sink efficiently. Put about the size of a pea’s worth of thermal paste in the middle of the CPU. The paste will cover the whole surface of the heat sink when you put it on top of the CPU.
Finally, put the heat sink on top of the CPU and make sure the thermal paste covers the whole thing evenly and thinly. Use rubbing alcohol and a lint-free cloth to clean up any extra paste. Follow the instructions that came with your motherboard to attach the heat sink, and then connect the fan that cools the heat sink to the right port on the motherboard.
Well done, you’ve successfully installed your CPU! It’s important to pay close attention to every detail during this step of making a PC, but it can be done without any problems.
Installing your PC’s memory and storage is an important but simple step in the process.
Installing Your Storage and Memory
For Memory (RAM)
1. Find the RAM slots on your hardware next to the CPU. These are usually lined up vertically.
2. Carefully place your RAM sticks in these holes, making sure that the notches line up. Put the RAM into the first spot on the left and press down hard until the locking clips snap into place, locking the RAM in place.
3. If you have two RAM sticks, you should put them far apart for the best results. To use dual-channel memory design, which speeds things up, you should usually leave an empty slot between them. Read the instructions that came with your motherboard to find out how to install your RAM in the best way.
For Storage (HDD, SSD, or M.2 SSD):
1. Find a free drive bay at the front of your PC case for your hard drives (HDD) or solid-state drives (SSD) that are 2.5 inches in size. Slide the drive into the slot, and then use screws to keep it in place.
2. Find the M.2 slot on your motherboard if you want to add an M.2 SSD, which is much smaller and looks like a stick of gum. This slot is made just for M.2 drives and lets them connect directly to the processor. Check the manual that came with your motherboard to find out exactly where the M.2 slot is. Then, carefully insert the SSD and lock it with the screw that came with it.
These steps will make sure that your memory and storage are installed properly, which will set the stage for great PC performance. Remember that if you’re not sure what to do, the motherboard manual is a great place to start because it has detailed directions that are specific to your hardware.
Installing the Motherboard and Power Supply
A key part of putting together your PC in a methodical way is installing the Motherboard and power supply.
Installing the Motherboard:
1. Get your case ready by laying it out flat and making sure it’s ready to take the motherboard. Remove any side doors or other things that are in the way as needed.
2. Read the instructions that came with your motherboard to learn how it is laid out and where the screw holes are located.
3. Use care to put the motherboard inside the case, making sure that the screw holes on the motherboard line up with the standoffs or fixing points in the case. It’s very important that the I/O ports line up with the holes in the back panel of the case.
4. Use screws to attach the motherboard to the case, but be careful not to overtighten them or damage the motherboard.
Putting in the power supply (PSU):
1. Find the place in your case where the power supply should go. This is usually at the bottom or top of the rear part. The exact placing will depend on the layout of the case and the orientation of the PSU.
2. Place the power source in its slot, making sure that the fan faces the right way according to the case’s ventilation design. Usually, the fan should face downwards or towards a vent to allow air to flow properly.
3. Use the screws that came with the power source to attach it to the case. Make sure the screws line up with the holes on the back of the case.
4. Do not connect the power cords at this point. Put the wires in a neat stack so that they are easy to connect to the motherboard and other parts in the next steps.
By carefully putting together the motherboard and power source, you create a solid base for the rest of your PC build, making sure that all the other parts will be supported and powered properly.
Installing Your Graphics Card
A very important part of putting together your game PC is installing your graphics processing unit (GPU), like the NVIDIA RTX 3080. Because current GPUs are pretty big, you need to think about how the space in your case will change.
Step 1: Find the PCIe slot
If you look in the instructions for your motherboard, you can find the PCIe slot. It is usually horizontal and has a small plastic latch in the middle or bottom.
This slot is meant to fit your GPU and give it the connection it needs to talk to the motherboard.
Step 2: Put in the GPU
Line up the cutouts on the back of the case with the connection side of the GPU (the side with the HDMI and DisplayPort outputs).
Carefully put the GPU into the PCIe slot, making sure that the back ports line up with the holes in the case. Even press on the card until it is fully in place and the latch clicks shut, locking the GPU in place.
Step 3: Make sure the GPU is safe
Attach the card to the case with the small screws that came with your case or GPU. This will keep the card from moving and make it more stable. The holes for the screws will line up with the metal bracket that holds the HDMI and DisplayPort cables.
Step 4: Plug the GPU in and turn it on
Check the power wires that come from your power supply unit (PSU) for connectors that match the GPU’s power input, which could be a rectangle-shaped 6 or 8-pin arrangement.
Carefully connect these to your GPU to make sure it gets the power it needs to work.
When you need more help, you could watch how-to videos from reliable hardware makers like Asus. Even though some details may be different, these tools can help you successfully install your GPU, making sure that your gaming PC is ready for high-performance tasks.
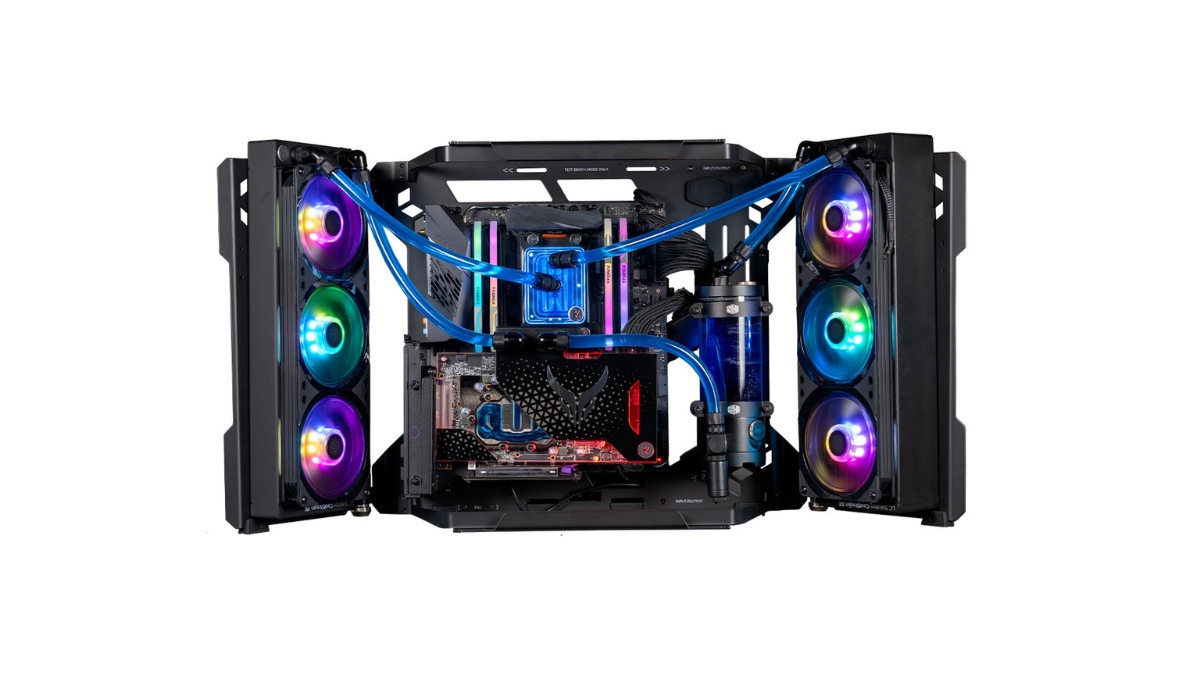
Ribbon Cables
An important part of putting together your PC is making sure that all of your devices are connected to the motherboard and that the cables are properly organised. With a fully modular power supply unit (PSU), like the one shown here, you can pick and choose only the cords you need. This keeps things neat by preventing extra cables from being plugged in. To connect the power supply, do the following:
To the SSD and motherboard
Find the power wires that go from your PSU to your SSD and motherboard. This is most likely going to be a SATA power port for the SSD. A bigger 24-pin ATX power connector is usually needed for the motherboard, and an extra 4 or 8-pin CPU power connector may also be needed, based on what the motherboard needs.
To connect the motherboard to your case, do the following
Use the front panel connectors. The power button, the reset button, the power LED, the HDD LED, the audio plugs, and the USB ports are some of these. For each of these, the motherboard has its own headers, which are usually near the bottom. Because they are so small and need to be connected in a certain way, it’s important to check your motherboard’s instructions.
Case Fans
If your motherboard doesn’t have enough fan headers for all of your case fans, you may need to use a fan hub, a splitter, or make sure that your case fans have power ports that work with your PSU. Follow the instructions in the manual to connect the fans to the right headers on the motherboard.
SATA Cable for SSD
Your SSD will need both power and a way to send data to the computer. To do this, plug one end of the SATA wire into the SSD and the other end into a free SATA port on the motherboard.
Managing the cables is very important during this process. Cable ties make it easy to organise and secure cords so they don’t get in the way of airflow or fans inside the case. Make sure that no loose wires touch the fan blades or any other parts that move.
Check each link twice to make sure it’s safe and facing the right way. The manuals for your specific parts will be very helpful at this point because they have detailed guidance and pictures for each connection.
Boot It Up and Install Windows
The last steps in finishing your build are turning on your newly put together PC and running Windows. Here’s how to go about this stage:
1. Press the power button on your case to turn it on for the first time. When you turn on your PC, fans should start spinning and lights should come on if everything was put together properly. Don’t worry if it won’t start. Problems that happen a lot could be loose connections, parts that aren’t set properly, or wrong wiring.
2. Fixing problems: If your PC won’t turn on:
Go over each step of your assembly again and again to make sure all the parts are connected and placed correctly.
Watching troubleshooting tips, like the Kingston video, can help you figure out what the problem is.
Think about the chance that the hardware is broken. If you can, test each part separately, or look at online tools to figure out which parts are broken.
3. Setting up Windows: After your PC turns on successfully:
Turn it off and put in the Windows installation USB drive that you made earlier.
Turn the PC back on and start the BIOS/UEFI setup by pressing a key like Delete, F2, or F12 during boot-up. For the exact key, check the manual that came with your motherboard.
Make the USB drive the main start device in the BIOS or UEFI. This will let your PC start up from the USB drive and begin installing Windows.
To run Windows, just follow the steps shown on the screen. You’ll have to choose the type of installation, agree to the rules, pick the installation drive (which is usually your SSD or HDD), and finish setting up.
Fourth and final step: Once Windows is installed, you’ll need to set up your computer by making a user account, customising settings, and connecting to the internet. Make sure you install all of your hardware’s drivers, which you can usually find on the website of the hardware’s maker. Also, run Windows Update to get the most recent changes.
By carefully following these steps, you’ll go from putting together your PC to having a fully functional system that you can use for work, games, or anything else you have planned.